Making good use of my dehydrator
As I was sorting through the fridge this week, I noticed a bunch of apples that were sitting around, not getting eaten. They weren’t bad, but they had lost their crunch, and no one (including myself) felt like eating them. I suppose I could have juiced them, but we already had some apple juice, plus bags of frozen applesauce in the freezer, so instead I opted to make my daughter’s favorite snack- fruit leather!
It is so incredibly simple! All you need to do is:
- Cut and core the apples (I don’t even peel them, because mine are organic and my blender is powerful, but you can if you want to)
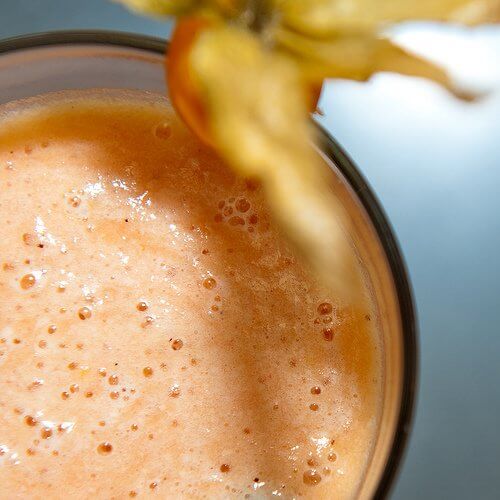
- Add them to a blender with enough water to get them moving well
- Toss in other fruits if you like (I had an extra orange lying around so I used that, as well as about 1 cup of blueberries from the freezer). You can use almost any mixture of fruit you like, although apple really makes a great base. Try combinations using bananas, berries, peaches, pears, etc.
- Add superfoods or supplements (optional- I often put in a green food, like spirulina, or this time I used liquid chlorophyll. Part of the reason for the blueberries was to hide the green color so they were more attractive looking)
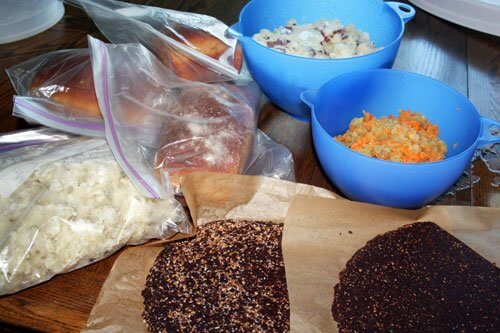
Use the teflex sheets in your dehydrator (rather than just the mesh sheets on the trays), and pour the mixture thickly onto the sheets. If you can choose the temperature, I find that round 95-105 works well for fruit. If not, it will work fine at whatever temperature yours is set at.
Leave it for several hours (depending how thick you poured it, it can take half a day or longer), until it is not very tacky or sticky and you can peel it off of the teflex. Try not to over-dry them, as then they are too tough and chewy. I prefer to take them off as soon as I can cleanly peel them away.
Cut into whatever shape you like (mine are random triangle shapes, because my dehydrator is circular), and store in a tightly sealed ziploc or storage container. I keep mine in the pantry and they last just fine, even up to several months, although they are generally eaten long before there is any risk of them going bad! The wonderful thing about making fruit leathers is that they are very forgiving- you can “mess up” and they still generally turn out pretty well!
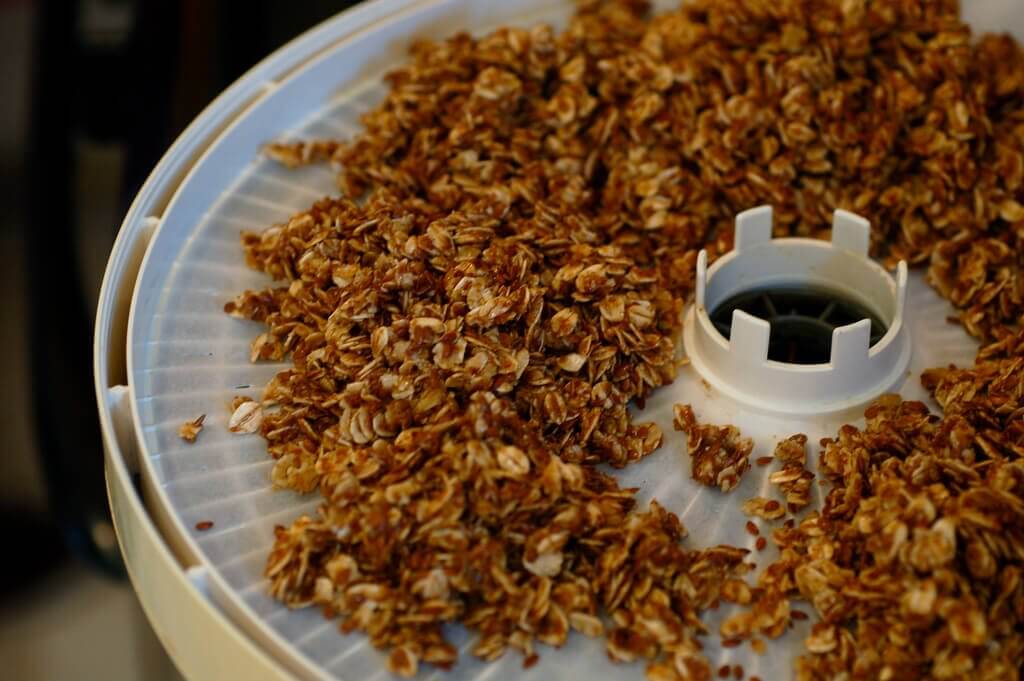
For the more adventurous among you, here’s another dehydrator recipe that I am in love with, that I will pass on to you. It’s a raw, sprouted granola made with buckwheat (sprouted grains and legumes are incredibly good for you!), which is something I can have in my current diet, although I love to eat this stuff all the time anyways. It’s so good with yogurt, a bit of honey or stevia, and some fruit or berries.
*A quick disclaimer. If you’ve never had buckwheat before, at least not like this, it has a different flavor that requires a bit of getting used to. My husband still doesn’t prefer it, so I make this only for me and my daughter (who loves it).
Homemade Granola Recipe
Ingredients
- About 14-16 cups sprouted buckwheat I get this amount by sprouting two medium sized packages of the whitish-green, not the dark brown kasha, buckwheat from my baking aisle in the grocery store- it's probably about 4-5 cups of dry buckwheat.
- 3/4 cup extra virgin olive oil
- 3/4 cup raw honey
- 1 coffee grinder's worth of ground flax seeds
- 2 coffee grinder's worth of ground raw sesame seeds you can interchange these two somewhat- I was low on sesame seeds, so I did 2 grinder's of flax and only 1 of sesame and it was fine
- Lots of raisins to taste
- Lots of goodies such as handfuls of raw pumpkin seeds raw sunflower seeds, chopped almonds or walnuts, dried fruit of choice (unsulphured apricots, dates, figs, cranberries, etc.)
- A bit of cinnamon a tsp or a little more? and a cap full of vanilla. Flavor to your taste.
Instructions
- Sprout the buckwheat. Here's a very simple explanation of how to do it: Soak buckwheat overnight in a bowl of water. In the morning, put the buckwheat in a colander, and rinse it very, very well with cold water (buckwheat emits a mucilage, much like flax seeds when they get wet, so if you don't rinse well enough, they get goopy and smell very off- make sure to shake them around while rinsing to do a thorough job each time). Set the colander in or over a bowl, cover it with a towel and set it aside. Before you go to bed, rinse very well again, and cover overnight. Continue to rinse at least twice a day until it has short sprouts- around 1/2 cm (maybe a 1/4 of an inch or a little shorter?). It usually take 2-3 days.
- Mix all together well in a very large mixing bowl.
- Spread on greased mesh dehydrator sheets, just high enough so you can easily fit the next tray on top.
- After a few hours, use a fork to break it up a bit into chunks. Leave it to dehydrate overnight or until completely dry and crispy.
You can easily play around with this recipe by adding things that sound good to you- maple syrup, coconut, apples, blueberries, different spices, etc.
And for those wondering how I made this without honey, which I can’t eat right now, here’s what I did. I put a generous handful of dried dates in the blender with 3/4 cup water (to mimic the amount of honey used) and I added about 20 drops of stevia to it, and just mixed that in with the rest as usual. It’s not quite as sweet as I prefer it, but it worked pretty well, and the raising help to make up for the lack of sweetness.

My boys have been asking me to try to make fruit leather. It sounds easy to do…and a great snack to have on hand.
I was just wondering what kind of dehydrator you would recommend. I did have a Nesco snackmaster, but found it wasn’t the best for fruit leather somehow…
I’m pleased to have found your site- I look forward to reading more!
Liberty
http://www.healedofdepression.blogspot.com
Hi, Stephanie – Just wondering what kind of dehydrator you would recommend…I’ve been looking for one that works well, but won’t break the bank! 🙂
Hi Stephanie,
We LOVE fruit leather here. I don’t have a dehydrator. I just use my oven. I pour it onto a cookie sheet and then I put it in the oven overnight on the lowest setting with the door slightly ajar. My littles are 1.5 & 3.5 so I can only do this overnight while they sleep. Our favorite is strawberry fruit leather. I usually make it as we get closer to strawberry season with anything I have left in the freeze from the previous season. YUM!!! Apple is very yummy too, as is blueberry. Thanks for sharing!
Hi gals,
My dehydrator is the American Harvest Snackmaster. It actually came from my MIL, who had two and graciously gave one to me. Knowing her, it came from a thrift store or garage sale, because she is the queen of deals.
But, I don’t love it (sorry, Janet- I’m still 100% grateful for it, but you and I both know which one we’d choose if money wasn’t an issue!). My ideal would be the Excalibur, which is square, rather than round. Some things just don’t work as well on round trays.
That said, it works just fine overall. It dries things (and isn’t that the point?), and has an adjustable temperature as well. Honestly, I think most dehydrators work fine, but if you want a really great one you might need to splurge on something like the Excalibur. I would definitely check out Craigslist (because so many people buy them, never use them, and then sell them cheap), garage sales now that it’s almost spring, and ebay.
Thanks for these very healthful recipes!I will have to try these in the oven,since I don`t have a dehydrator.I will come back and visit again!I have been learning alot from Nourishing Traditions and your blog is great too!
Your sprouted buckwheat granola recipe sounds like a great breakfast start to the day.
Could you be more precise about how much a coffee grinders’ worth would measure ?
Sorry for the vague directions! That’s how it’s stated in the original recipe book, and that’s how I measure mine. However, I would guesstimate that a coffee grinder’s worth is about 1/2 cup. Hope that helps!
Hi! I recently stumbled across your site from a post in Simple Organic. I am hooked! I’ve been spending quite some time going through your older posts and definitely am inspired. I know this is an older post, but I do have a question – you mentioned your blender. What kind is it? I’m not happy with mine, having purchased a cheap one, so I’m donating it to our local Christian Services store and am looking to upgrade.
.-= Christy´s last blog ..Welcome. =-.
@Christy, I have a Vitamix. It was a birthday/Christmas/savings splurge from my hubby. They’re pricey, but they have an amazing warranty and they are absolute workhorses. I use mine constantly and it never fails me. If you’re willing to spend significantly more, you could expect to get a good 10+ years out of one of these, and possibly longer!