How I’m Learning to Make Incredible Artisan Bread (and a Giveaway So You Can, Too!)
Of all the foods we ate while on our trip, one that stands out most to me was the bread in France.
It didn’t matter where we were. Rural town or large city, we would seek out a local bakery and get a fresh loaf each day.
Sometimes we chose the large, rounded loaves with a cross etched in the middle. Other times a simple, crusty baguette. There was sourdough, and chewy white loaves, and hearty multigrain breads.
So many options, but what they all had in common was that their traditional baking methods made those few ingredients – flour, water, salt, and maybe yeast – absolutely sing with the richest flavor.
Every nuance of the grain came out, in a sweet and almost nutty, hearty flavor that you just don’t get in regular sandwich loaves from the store. Their flavor comes from the added ingredients, and often from a bit of sweetener. The difference with the bread in France (and really, most of Europe) was that the bakers had learned to coax the bread’s true flavor to come out of hiding.
I’ve been baking bread, on and off, for a long time. And I can make a not-too-shabby loaf. But it doesn’t taste like the artisanal loaves we ate in France.
When I was talking several months back with Craftsy about which courses I’d like to review (you can read my knife skills review here), I was immediately drawn to the Artisan Bread Making course.
As much as I adore a superb, hand-crafted loaf of artisanal bread, I really can’t afford to buy it very often and truthfully, it’s pretty hard to find high quality bread where I live. Which means learning to make it myself was probably my best bet.
Learning to bake Artisan Bread
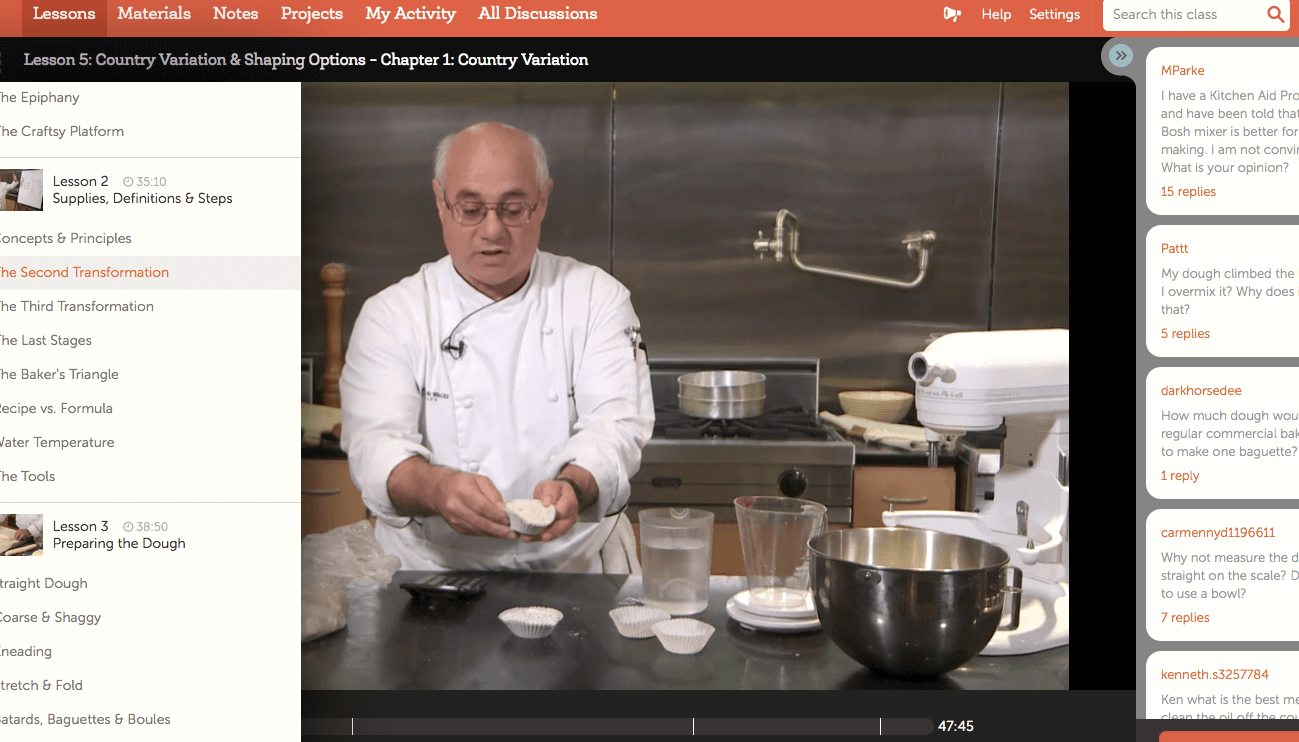
I began the course several weeks ago, on a slow afternoon where I had time to sit down and really take in the instructions. Lessons 2 and 3 (Supplies, Definitions & Steps, and then Preparing the Dough) were really important for me, because I wanted to deeply understand the science and art behind what makes a bread really great, instead of just good.
The instructor is a professional baker and instructor named Peter Reinhart, and it’s clear that not only is he passionate about the art of bread making, but he understands it inside out. I appreciated his careful and thorough explanations. He demonstrated the tools that would be most helpful in my bread making, but also offered alternative ways to do things if I didn’t have all the right things on hand (which I didn’t).
Because I really wanted to learn the most basic, foundational techniques first, I started with a Lean or Straight Dough, which is simply flour, water, yeast and salt. This is what you’d use to make your basic baguettes or boules (rounded loaves), as well as a batard (somewhere between the long, skinny baguette and the rounded boule).
It seems common sense to me now, but I had never realized that each of these breads would be made with the same basic dough, but that it was the size and shape of the bread that affected the crust and the softness or chewiness. If you’re all about that crust, you want a baguette. If you really enjoy that lovely, softer texture (the crumb), you’ll want to make a boule so you have more soft interior and less crust. Like both equally? Go for a batard, to get the best of both worlds.
Making the dough was both easier and more complex than I thought. It was easy in that there were so few ingredients to measure and no heavy mixing or kneading required. I loved that.
It was a bit more complex in that it required me to set a timer and keep going back to my dough every hour to stretch and roll it for a few minutes before allowing it to sit again. That said, I think that once you get the hang of it, the process wouldn’t feel complex but would just be a quick pause that you take as you go about your day.
My understanding of the why behind this method is that rather than the constant kneading, you very gently pull the dough to work the gluten but without overworking it. You’re allowing the gluten to develop very naturally, and this contributes to the uneven holes that develop, which give it that true artisan look and which also allows the rich flavors to fully develop.
Either way, I made it through these steps and came to the shaping. His instructions were so clear and easy to follow. I don’t think I’ll ever forget how to shape any of these three types of loaves from now on!
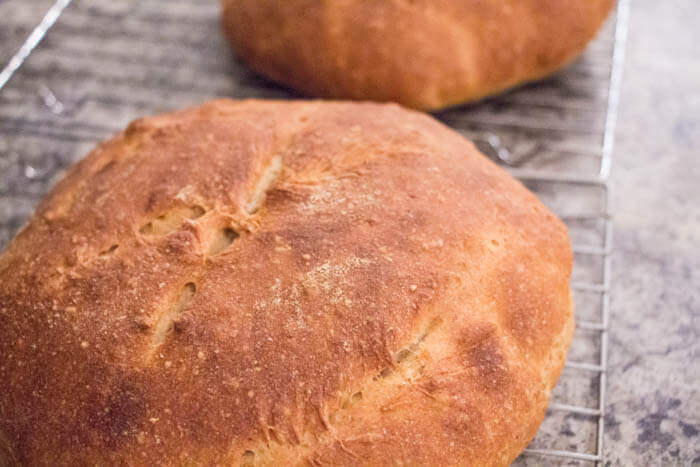
We chose to make two small boules, at least for our first attempt (but next time, I’d like to try a batard).
Here’s our finished loaf:
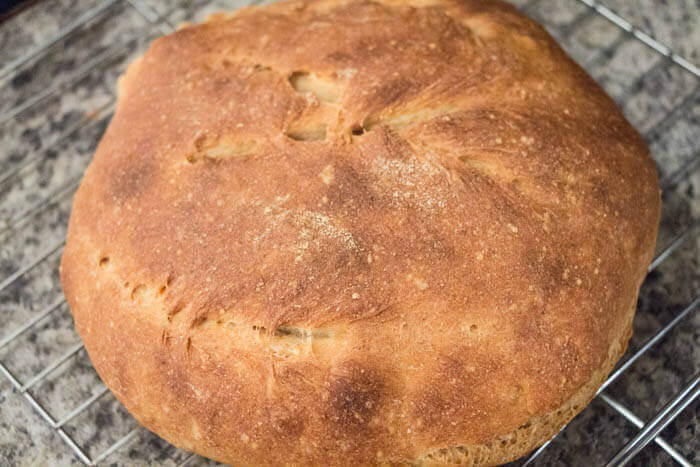
I know that I made a couple of small mistakes, just by not following along quite carefully enough. I didn’t realize until after that I had mistakenly allowed the loaf to finish rising on my flat surface instead of in the bowl as he showed in the videos, and I think that contributed to a slighter flatter loaf than I might have had otherwise.
Also, I cheated slightly, and instead of using all organic unbleached wheat flour, I used half Einkorn flour (for those who have never heard of it before, Einkorn is an ancient form of wheat). I was curious to see how it would work and if the gluten would develop well since Einkorn has lower gluten levels than regular wheat, but it still seemed to work just fine.
There weren’t specific directions for the exact baking time, only instructions for what to look for (color of loaf, sounding hollow when tapped, and an internal temperature). I don’t own a food thermometer, so I couldn’t check the internal temperature and had to guess based only on the color and sound.
We cut into it, to see if we had actually succeeded in our attempt. It was light, moist, and a perfect amount of soft, chewy crumb, with a wonderful flavor.
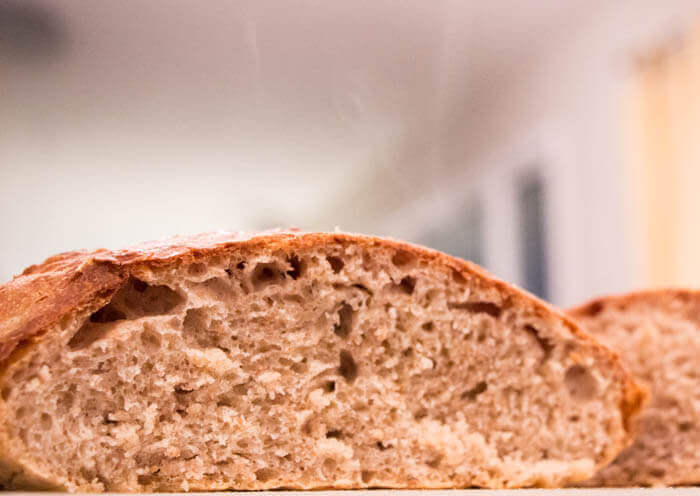
Peter noted that the sign of a real artisan loaf is uneven air pockets spaced throughout. My air pockets are a bit too uniform, but there are some larger, uneven pockets in there, so that means that (while not perfect) I did get it somewhat right. My next loaf can only get better, right?
Now, reading this post, you might think that I actually have some sort of preexisting knowledge about artisan bread baking, right? But you’d be wrong. I haven’t even made it halfway through this course yet, but pretty much every knowledgeable-sounding thing I’ve spouted off in this post came straight from the course and Peter’s awesome teaching. How cool is that? I sound like I know what I’m talking about, y’all!
(Even better, my bread tasted pretty stinkin’ good. We ate it with homemade turkey vegetable soup and my kids raved about it and devoured a loaf and a half in a single sitting.)
Want to try your hand at making artisan breads?
You can! Head on over to the Craftsy website, where you can sign up for the Artisan Bread Making course.
The generous folks at Craftsy are also giving away a course to one lucky reader, which is a $39.99 value. I hope it’s you!
Please note that the giveaway will only be open for a limited time, closing on 11/5 at 11:59pm MT. The winner will be contacted via email by Craftsy.
Giveaway is open to anyone internationally.


THIS is SO what I need!! Learning to make bread along with learning to knit are two of my sustainable living goals for this year and looks like Craftsy may be able to help me with both:)
Thank you so much for sharing your experience Stephanie!
Oh, love that you’re learning to knit this year! So fun! 🙂
{Kathy} It was great meeting you at Allume! I, too, am a BIG fan of European bread. I practically eat my weight in bread in France and Italy. Thanks for this great giveaway. I’ll let you know if my air pockets look gorgeous!
It was so great to meet you, too! And seriously… who could not love European bread? Can’t wait to hear about your air pockets. 🙂
So yummy! I’ve read several of his books, and I love that he’s always learning and growing and trying new things through the years. His pizza class (free on craftsy!) applies these same principles and techniques to pizza dough. Best pizza ever 🙂 Right now I’m reading his Artisan Breads Every Day and it’s fantastic so far. Thanks for sharing and your loaf looks beautiful!
I keep hearing that about his pizza class, so I better just go ahead and take it!
My mouth is watering just reading this post!!! I currently get my artisan bread fix via my mom every few weeks- she picks up 3 loaves for me at a gourmet market near her house and then carries them on the bus and train (2 hour commute) to my house. Every so often she’s unable to score some and then I’m artisan-bread-less until her next visit. So not only would I be thrilled to be able to make it myself, but I know she would be, too 😛 Thank you for the review and opportunity!
Oh, you’re so lucky you’ve got a place to get them! But it definitely would be easier to make it ourselves, huh? Even my husband wants to give it a try. 🙂