Squeaky Clean Fun: A Soap Making Photo Tutorial

By Beth Corcoran, Contributing Writer
To start, I just want to say I am so excited that Stephanie is allowing me the opportunity to share with you one of my favorite hobbies–soap making. I have been making bar soap for my family for almost a year now, and I have tried different methods and a variety of recipes, and today I’m going to share what I think is one of the easiest methods of soap making—hot process using a crock pot.
I really wanted to share this tutorial because a lot of people I have met have said to me, “Beth, you make soap?! But isn’t that difficult and time consuming and dangerous?!” I am hoping to show you that you, too, can make high quality, good-for-your-skin (and inexpensive) lye soap at home with just a little instruction and encouragement. When I started making soap, I was very intimidated and confused. But I found that having someone walk me through the process really helped. So that is just exactly what I want to do for you!
The purpose of this tutorial is not to define all the soap making terms or to give you a list of resources. But after you check out my tutorial, if you head over to my blog, I’ll have a page that hits more on the tips and resources for soap making aimed at helping the soapmaking “newbie.”
That said, let the fun begin!
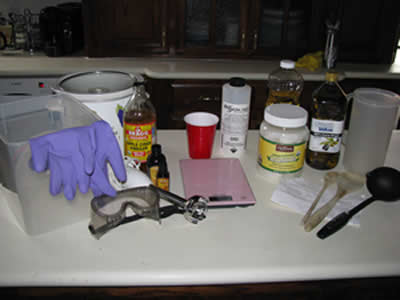
To start your soap making experience, you will want to lay out all your necessary items. While you probably don’t have lye just sitting around your home, you may already have many of the items you need.
Equipment you will need includes:
- Crockpot
- Spoons (wooden or rubber/plastic only!)
- A disposable cup or plastic sandwich baggie
- A pitcher
- A heat resistant container such as a mason jar
- An immersion blender
- A soap mold of your choice
- Vaseline
- An accurate food scale that you can zero out.
You will also need proper safety equipment such as goggles and gloves to protect from the lye. You will want to also make sure to wear long sleeved shirts and long pants and closed toed shoes. You don’t want a chemical burn!!
Finally, you will need the oils for your recipe, the lye, cold tap water, and essential oils or additives, vinegar to clean everything afterward—the cheapest kind will do—and, finally, some paper towels to clean up the lye because you won’t want to use cloth rags to clean up the caustic chemicals.
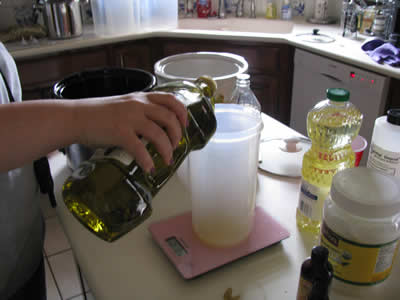
Once you have gathered everything, you will want to set your crockpot to high and let it heat up. Place the pitcher on the scale and zero it out. Measure the oils, one at a time, into the pitcher. Your recipe will tell you how much of each oil you need. Remember that in soap recipes, the ounces refer to weight, not liquid measurement!!

After measuring each oil, pour it into the crockpot. Using a spoon, you’ll want to get as much as possible out of that pitcher to maintain the proper ratio of lye to oil. If you have solid oils, such as coconut or palm, let the oils melt down in the crockpot.
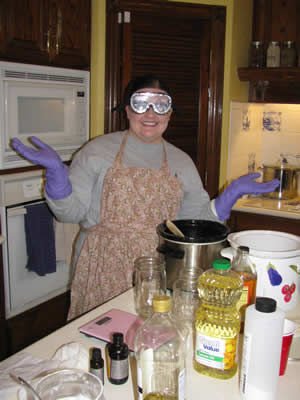
At this point, you will want to put on your gloves and goggles.
While the oils are melting down, place your heat proof container (I use a wide mouthed mason jar) on the scale and zero it out. Add the proper measurement of water to the jar. Then, remove the jar and set aside.
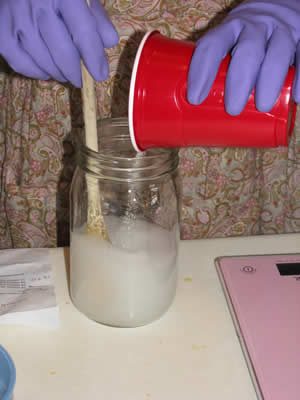
Using a plastic disposable cup or a plastic baggie on the scale, carefully measure your lye. Then, slowly pour it into the water, stirring as your pour to avoid any clumping.
Note: NEVER add water to lye. ALWAYS add the lye to the water. Stir until it is completely dissolved and the water is mostly clear. At this point, the water will be extremely hot because of the chemical reaction. So make sure you don’t burn yourself or your counter top!
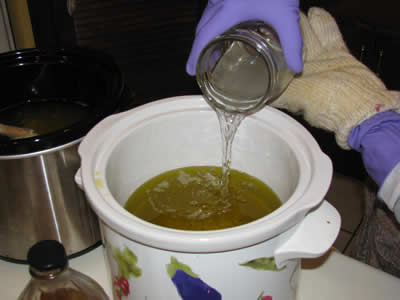
Once your oils are melted, pour the lye/water solution into the crockpot with the oils. Stir together well.
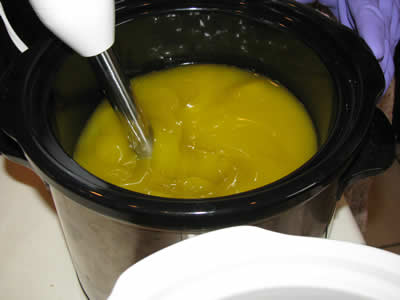
Now it’s time for the immersion blender. Carefully blend the oil and lye mixture together, pulsing for about 6-10 seconds at a time. Be sure the stick of the blender is all the way down because lye is caustic and you don’t want it flying up in your face.
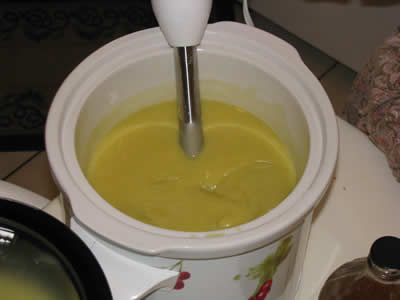
You will want to blend everything until it reaches what is called “trace.” Trace happens when the soap mixture reaches what looks like a thin pudding consistency. Be sure to periodically turn the blender off and stir everything down because stick blenders can cause so many bubbles to form in the soap that it can create a “false trace.” It generally takes me about 10 minutes for the soap to reach trace.
Now put the lid on the crockpot and let it cook for a while. While it is cooking, I generally put all of my used utensils into the pitcher I used for my oil, and then I pour vinegar and water into the pitcher to neutralize the very basic lye. I then wipe down my counter tops and gloves with vinegar before I remove my goggles and gloves. While I’m waiting on the soap to cook, I also coat the inside of my soap mold with Vaseline so that when I am ready to pour my soap, it will not stick to the mold.
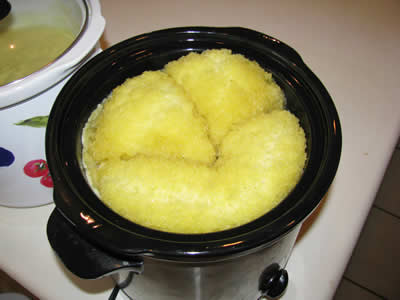
As soap cooks, it generally “grows” and looks like a gel consistency. If it grows too big, just stir it down.
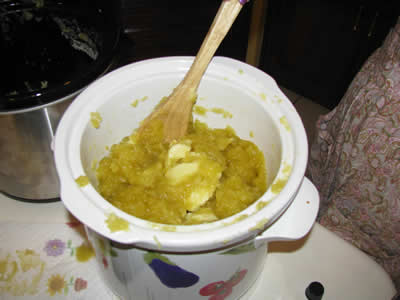
You’ll find that inside your big gooey gel, there will be patches of smooth whitish soap. Make sure you stir that in because that is soap that hasn’t fully cooked yet.
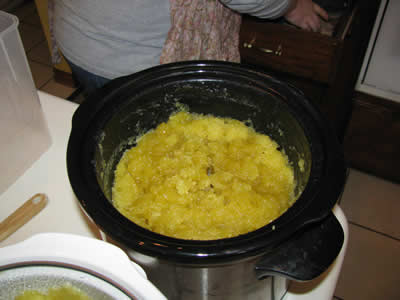
Once the soap is consistently a semi-translucent yellowish color, you can now add your additives such as essential oil, oatmeal, etc. Or you can leave it plain, which is the way I prefer.
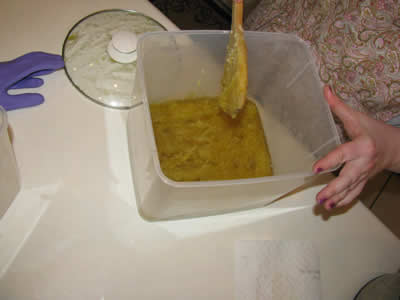
It should now be ready to pour into your mold. Pour quickly because it forms a crust rather quickly. I use a rubber spatula and parchment paper to smooth my tops out in the mold.
Let the soap cool thoroughly, and finish cleaning everything up.
Depending on the size of the mold, it could take up to a day for the soap to cool and dry. Once it has cooled, carefully remove the soap from mold and cut it if necessary. Although the soap is ready to use immediately, I let the bars sit out for a couple of days to improve their hardness. The soap also becomes milder the longer it sits.
And that’s it! It’s really quite simple, and you have wonderfully nourishing homemade soap for your family! And once you know what you are doing, the whole process from start to finish can be done in less than two hours, so it can be done while kids are napping.
And now for the really fun part!
How would you like to use some of the soap that I cooked while making this tutorial?
I will be giving away one pound of soap from the batch pictured above—that’s 4 bars of soap–to one lucky winner. When you visit my blog for more tips and resources, you’ll find out more information on the giveaway.
Have you made your own soap before? What are your favorite soap making resources to share?
;
I’ve always wanted to try making soap, but the husband would kill me if I started ANOTHER hobby. LOL.
.-= Wendy (The Local Cook)´s last blog ..Top 10 Questions to Ask Before Joining a CSA =-.
I can’t figure out how to leave a comment on her site? Am I just not seeing it or is anyone else experiencing this?
@Cathy, It looks like this has been fixed. There is a new link for it now so go ahead and try again! Sorry about that!
I don’t see a link for adding comments, either. 🙁 Bummer.
I do want to try this, though!
@Judy, It looks like Beth has added a new link for entering a comment!
I make soap as well but haven’t for about 2years since my youngest was born…but I want to get back into the swing of things. One thing I’m curious about is your cure time. I learned that you needed to wait 2-3weeks before using to make sure the lye isn’t caustic anymore…any info would be great on that.
I also couldn’t see where to comment on the blog.
Thanks for the fun post.
Suzy
@Suzy, There is a new link now so that you can enter the giveaway!
I so want to try this! Awesome tutorial!
.-= Teresa´s last blog ..Baseball Season – Oh Yeah! =-.
Sorry everyone! I’m not sure why it’s not allowing comments on that page, but I have set up a new giveaway page for soap.
Just go to http://stewardshipnotconvenience.blogspot.com/2010/04/soap-making-giveaway.html
Thanks!
Beth
.-= Beth C´s last blog ..Soap Making Giveaway =-.
I might be missing it, but I don’t see which temperature level to set the crockpot at.
@Judy, It should be set to high.
Funny, I do a cold process that is verrrry similar with a few less steps and I use the microwave instead of the crockpot.
I was just searching your blog the other day for soap making. I have been wanting to make soap for months now. I love this post. Thanks!
Started making my own soap in December (cold process) and LOVE it!!
Ooh great tutorial, now just to find a great recipe! Im wondering if I can use something other than Vaseline though, or maybe a non-petroleum derived but very similar product?
@Ashley C, Yes, you can use other things…you’ll need to do some research to find what will work best for you. The reason something like Vaseline is recommended is because it is not an oil, and it will not saponify as it comes in contact with the lye. This is not a problem with hot process soaps because the lye has already reacted. But if you do cold process, you are going to want to find something that won’t saponify, too. (If the oil that you use to lubricate the mold saponifies, then your soap will stick to the mold pretty badly!) I had the Vaseline left over from my cold process days, and once it is used up then I’ll move on to something a bit healthier. 🙂 Hope that helps!
~Beth
.-= Beth C´s last blog ..Soap Making Giveaway =-.
Ashlely, I dont use Vaseline, I use mineral oil.
Thanks for the tutorial! I have been wanting to make my own soap, but have been too intimidated by the process to ever try it. This looks relatively easy, though! This might be a dumb question, so forgive me if it is, but do you use your normal crockpot that you cook food in to make the soap in? Or do you have a different one for this purpose? I know its just soap, but I was wondering if it is still ok to cook food in later because of the lye. Thanks!
@Kate E., Good question! I was wondering the exact same thing!
I was just searching your blog the other day for soap making. I have been wanting to make soap for months now. I love this post. Thanks!
Thanks for the tutorial! I have been wanting to make my own soap, but have been too intimidated by the process to ever try it. This looks relatively easy, though! This might be a dumb question, so forgive me if it is, but do you use your normal crockpot that you cook food in to make the soap in? Or do you have a different one for this purpose? I know its just soap, but I was wondering if it is still ok to cook food in later because of the lye. Thanks!
Started making my own soap in December (cold process) and LOVE it!!
Is it necessary to have an immersion blender or can I just stir it?? I am trying to make the whole process as cost-effective as possible!!
Thank:)